Showing posts with label TAS5631B. Show all posts

Saturday, December 5, 2015

The current state of the project

I had my first amplifier test run almost two years ago so wanted to share the current state of the project.


Still far from perfect and definitely not final.
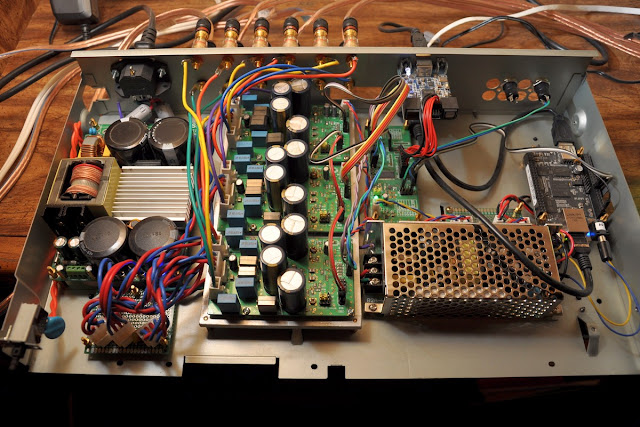
I just put it into a case of a useless Onkyo surround processor. The idea was to test if the amp fits into a slim case and do not overheat without any active cooling. It seems it does well so I'll need a nicer case soon... After I finish my migration to Raspberry, of course ;)

Thursday, April 16, 2015

How to fry TAS5631B. Guaranteed.

The happiness couldn't last forever and I found a pretty much stable way to make a toast out of TAS5631B,
Here is my simple recipe:

  • Connect VDD (+12) to the board
  • Short any single speaker output to the GND
  • Connect PVDD (+50)
  • Voila, /SD and READY outputs are always low and can't be cleared via /RESET or power cycle.
  • Cry and order a new chip

Datasheet says "The TAS5631B does not require a power-up sequence." and "it is recommended to hold RESET in a low state while powering up the device". Not sure holding down RESET can prevent mosfets from a premature death.

How could I find it out?

Well, that was my bad. I connected the power supply with 3-wire power cable. For some (probably good) reason power supply has the Earth electrically connected with the output GND.
As you may know, most scopes have the negative probe connected to Earth.

I fried two of my boards while I figured out why my scope doesn't show any signal...

I'm wondering now if there any way to test for a grounded output before applying PVDD.

Saturday, December 20, 2014

Got it together but not for a while

Finally we settled in our new house. Can't say I'm done with our new IKEA kitchen but it is usable now. So it's time to have some hobby fun and play with my amp and speakers.

Finally I put all six channels together with BeagleBone Black and two switching power supplies - one for power amp and one for the BBB. Also I got very sexy VFD display from eBay for a very good price so I'd like it to show some useful information very soon.

Standard Debian seems to be a good choice but I found two problems with it (updates a pretty frequent so the latest one may work better):
1. it can't find my USBStreamer if it was reconnected
2. MPD playback has noticeable drops.
Then I found a great distribution - Voyage MPD. It is outdated but it doesn't have these two problems I mentioned above. But this distribution would not work for folks who want to use HDMI output - HDMI itself works but HDMI audio output is not available.

So I mounted my NAS, set it all up and finally got my music played without drops and pops!

But my happiness did not last for long. I wanted more. So I tried to put some coefficients into loudness biquad... And got my tweeters fried in a faction of a second. As well as one TAS5631B chip.  Woofers and midranges survived.
So I got a very good lesson - always disconnect speakers when you play with biquads! And use a scope first!

Saturday, February 22, 2014

Digital Amplifier: First Run

It is time to turn my first amplifier board on.
Here is my first test setup:
Don't blame me for the power supply, I just scavenged transformer and capacitors from an old Sony tuner. My main concern at the moment is to test if my amplifier can produce any sound but not a sound quality which will be affected by such a power supply for sure. I will use a switching power supply soon, but I have to find a suitable one first.

It took some time to setup my BeagleBone to play music on MiniDSP USB Streamer. I will post details on that later, when I settle it out. Someone would ask me why not to use Raspberry? At the moment it doesn't support USB 2.0 audio devices well.
MiniDSP USB Streamer might be not the best in a family of USB->I2S converters since it doesn't have dedicated low-jitter clocks but it has 8 I2S channels. I'd like to test what is better - to have crossover on 5548 chip or to have it on BBB. I'll by better converter later if 5548 wins.

So what about the sound?
First pictures from the scope scared me...
Look at this (sorry, my digital scope just died):
Text is not readable on this picture but it shows PWM frequency on the output: ~1.25V at 384kHz.
Tried to switch from AD mode to BD ant got things look even worse:
What a disappointment!
But guys from TI forum told me it is expected and not a big deal. Also I found this video saying it is OK. I need to build a simple RC filter to check it out.
So I connected a junk speaker.... And spirits of electronics let me to hear the sound!

Then I found a couple of things I'm not very happy about:
  • Inductors heat up to 50 degrees Celsius even in idle mode (but PWM is on)
  • Electrolites heat up to 43 degrees Celsius. This temperature is far from critical but I'm afraid it would shorten capacitors life.
And a good thing: amplifier can easily output 25W RMS for a while without a real heatsink.

What about sound?
It sounds. My junk speaker did its best and I didn't hear any suspicious clicks, pops or any saturation that would be different from the same speaker powered with analog amp.
To test it in a real life I need to take the following steps:

  • assemble more boards (at least one since my speakers are still two-way)
  • put them on a real heatsink
  • put ceramic capacitors right under electrolytes to reduce ripple current a bit
  • calculate biquad coefficients for crossover
  • write some python code to initialize TAS5548 with crossover coefficients
  • buy a suitable switching power supply with switching frequency far beyond the audio band
still a lot of things to do... Why do people have to sleep?
Sunday, February 16, 2014

Soldered: TAS5631B amp

Here is my first amplifier board completed:

I put SMD inductors vertically while they supposed to lay on the PCB:

I have two good reasons for that - first of, it saves a lot of very limited space and the second - if the warm up it would help them to cool down (questionable, but makes me feel better).

Looks fine. Especially having in mind it is my first SMD project. Let's connect all my stuff together and check if it is able to produce any sound...